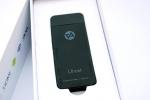
Wireless mini keyboard + Mini PC with Android 4.0 (ID: PC04+PC02)
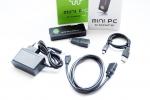
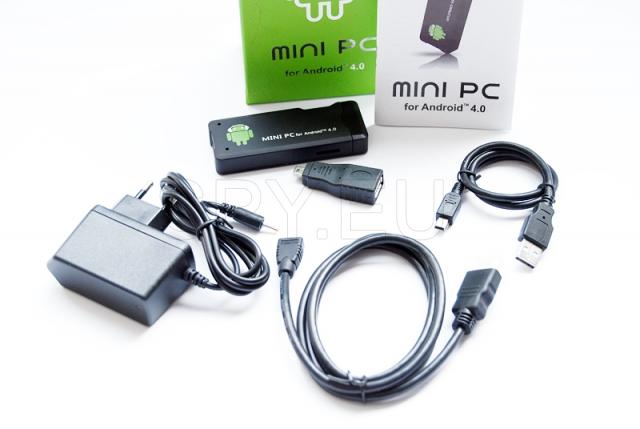
MK802 is a high-end model that turns your TV into a computer of latest generation, running Android 4.0. With this device you can surf the web, watch your favorite movies with subtitles, even removing your child latest 3D games and entertainment from Google Play Store.
Features
Model: AK-212MiniPC
Processor: Cortex-A8 1.5GHz (CPU1.0GHz + GPU 500MHz)
Graphics: 2D / 3D / OpenGL ES2.0 (AMD Z430) / OpenVG1.1 (AMD Z160) @ 27M Tri / sec
Operating System: Android 4.0
RAM: 512MB (with optional 1GB)
Memory: 4GB (with optional 8GB / 16GB)
Network: Wireless 802.11b/g/n, WAPI (Ralink8188) (with optional RJ45)
Applications: Youtube, Twitter, AngryBird, Office, Gmail, Browse, Skype.
USB Interface: USB 2.0 host * 2, USB Storage device
Video: WMV/ASF/MP4/3GP/3G2M4V/AVI/MJPEG/RV10/DivX/VC-1/MPEG-2/MPEG-4/H .263/H.264/1280 * 720P HD 30 fps, 1080P/720 * 480 D1 30fps
Audio: AAC, AAC +, eAAC +, AMR-NB, AMR-WB, QCP, MP3, WMA, WAV, MIDI , M4A
Output signal: 1920 * 1080P, 720P, 576P, Super HD 2160P, 3D Film
Interface: Video: HDMI1
Memory: 1USB-HOST, 1USB OTG, TF
Pictures: JPG, BMP, GIF, TIFF, PNG
Subtitles: SRT, UB, IDX, SSA, SMI
Adapter: 5V/2A
Dimensions: 88.5 x 35 x 13.4 мм.
Weight: 0.3kg
Wireless mini keyboard RC12 - PC04 :
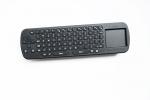
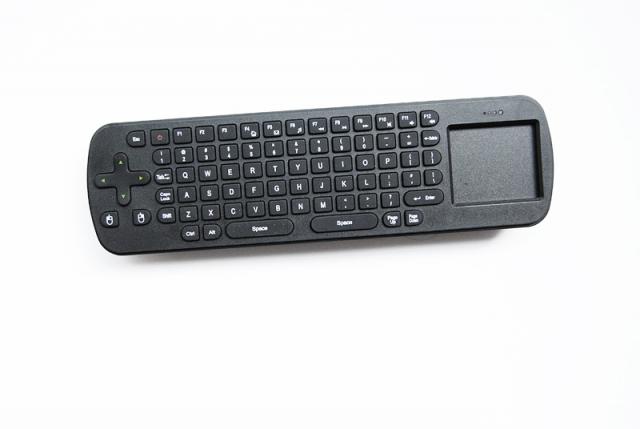
This wireless keyboard model is a very useful and practical technical tool, as it combines the functions of keyboard and mouse. Comfortable, lightweight and fitting the hands, this keyboard can be used in any case when you need to travel and can not take your laptop with you. Or just want to control remotely your computer, TV or entertainment system. A new way to play a movie, write an email, start a conversation in Skype. And much more. To work properly, it needs to be used on a flat, smooth surface.
Wireless mini keyboard + Mini PC with Android 4.0
video Wireless mini keyboard + Mini PC with Android 4.0
.jpg) A / V output: HDMI output for connecting to an HD TV
T-flash: The device can be upgraded with additional memory
Mini USB OTG: Used to transfer data to and from the computer and for reinstalling the OS.
USB host: You can use these devices as peripheral hardware accessories, such as sensor pen, keyboard, mouse, external hard drive and can be extended via USB hub and host multiple devices at the same time.
B. First use:
Connecting the hardware:
Connect TV or LCD monitor to the device with an HDMI port and cable included. Make the necessary settings on the screen to be able to work with it.
- This product supports 2.4G wireless mouse and keyboard. For this purpose, plug receiver 2.4G frequency for both peripherals into the USB port of the device. Or plug in via USB OTG port converter. If you include only wireless mouse, it will automatically MK802II out "soft" keyboard, ie on your TV screen keyboard will appear that will command via mouse. This keyboard is set automatically by the operating system when the OS detects a physical keyboard, the "soft" is deactivated again by the system.
- The left mouse button is used to confirm an action, right click for a step back, as well as scrolling the page up and down. To copy and paste a file or drag an icon, simply press and hold the left mouse button. Hold the middle button if you want to see the details.
1. Interface Operating System
Connect the power supply to the device on one side and a monitor or TV from the other, and after about a minute you should see a message that the device is connected, which is expressed in the following image:
A / V output: HDMI output for connecting to an HD TV
T-flash: The device can be upgraded with additional memory
Mini USB OTG: Used to transfer data to and from the computer and for reinstalling the OS.
USB host: You can use these devices as peripheral hardware accessories, such as sensor pen, keyboard, mouse, external hard drive and can be extended via USB hub and host multiple devices at the same time.
B. First use:
Connecting the hardware:
Connect TV or LCD monitor to the device with an HDMI port and cable included. Make the necessary settings on the screen to be able to work with it.
- This product supports 2.4G wireless mouse and keyboard. For this purpose, plug receiver 2.4G frequency for both peripherals into the USB port of the device. Or plug in via USB OTG port converter. If you include only wireless mouse, it will automatically MK802II out "soft" keyboard, ie on your TV screen keyboard will appear that will command via mouse. This keyboard is set automatically by the operating system when the OS detects a physical keyboard, the "soft" is deactivated again by the system.
- The left mouse button is used to confirm an action, right click for a step back, as well as scrolling the page up and down. To copy and paste a file or drag an icon, simply press and hold the left mouse button. Hold the middle button if you want to see the details.
1. Interface Operating System
Connect the power supply to the device on one side and a monitor or TV from the other, and after about a minute you should see a message that the device is connected, which is expressed in the following image:
.jpg) 2. Icon Management Software:
Drag and drop any icon you want to move to any position on the display.
2. Icon Management Software:
Drag and drop any icon you want to move to any position on the display.
.jpg) 3. Delete icon:
To delete an icon, just hold it with your mouse and drag it to the red cross sign.
3. Delete icon:
To delete an icon, just hold it with your mouse and drag it to the red cross sign.
.jpg) 4. Dragging to the desktop
Hold the arrow on any empty space, and move the mouse to the left and to the right takes you to the next desktop. You can also use the scroll bar on the mouse to the same effect.
4. Dragging to the desktop
Hold the arrow on any empty space, and move the mouse to the left and to the right takes you to the next desktop. You can also use the scroll bar on the mouse to the same effect.
.jpg) 5. Back home page, programs, performance / return, home page, program, properties /
5. Back home page, programs, performance / return, home page, program, properties /
.jpg) 6. Status / state / bar:
In the lower right corner is the status bar or bar with the conditions. It shows the current state of T-flash card, USB connection, time, Wi-fi network, downloads and more.
6. Status / state / bar:
In the lower right corner is the status bar or bar with the conditions. It shows the current state of T-flash card, USB connection, time, Wi-fi network, downloads and more.
.jpg) When there is a hidden menu by clicking on the status bar, it pops up and allows you to access it.
When there is a hidden menu by clicking on the status bar, it pops up and allows you to access it.
.jpg) In the right corner of the image above gives a thumbnail - more options. Push for more features and options.
In the right corner of the image above gives a thumbnail - more options. Push for more features and options.
.jpg) 7. key program tool:
Located in the upper right corner of the desktop
7. key program tool:
Located in the upper right corner of the desktop
![]() C. management programs through the adjacent icons
C. management programs through the adjacent icons
![]() Click this button to display a list of all currently installed programs and applications.
Click this button to display a list of all currently installed programs and applications.
.jpg) If you have more than one desktop filled with icons of applications, it is to get to the second, you must use the mouse wheel or simply move your mouse left and right. You can run these programs by clicking them directly, or drag-and-paste on the main desktop, where it will be activated.
Click on these
If you have more than one desktop filled with icons of applications, it is to get to the second, you must use the mouse wheel or simply move your mouse left and right. You can run these programs by clicking them directly, or drag-and-paste on the main desktop, where it will be activated.
Click on these
.jpg) then click and hold on any icon to make it a shortcut / shortcut / to the main desktop.
D. Settings:
To access the settings, just click on the following:
then click and hold on any icon to make it a shortcut / shortcut / to the main desktop.
D. Settings:
To access the settings, just click on the following:
.jpg) Where you'll see a list of all available settings of the device:
Where you'll see a list of all available settings of the device:
.jpg) 1. Wi-Fi settings:
1. Wi-Fi settings:
.jpg) 2. Settings USB to RJ45 LAN adapter:
The device allows you to hook up your computer and the receiver in a local network. But for that you need a special power cable that can connect to a USB host or USB OTG host. Connectivity: Connect RJ45 LAN cable, click on settings-more-Ethernet-tick the radio button Use Ethernet.
2. Settings USB to RJ45 LAN adapter:
The device allows you to hook up your computer and the receiver in a local network. But for that you need a special power cable that can connect to a USB host or USB OTG host. Connectivity: Connect RJ45 LAN cable, click on settings-more-Ethernet-tick the radio button Use Ethernet.
.jpg) E. Install / remove program
1. Setting "Unknown sources"
Device, namely the operating system detects a priority program Google market, which is why you should install it in order to work further with the device and install applications downloaded from there. To do this, click on setting - security - Unknown sources.
E. Install / remove program
1. Setting "Unknown sources"
Device, namely the operating system detects a priority program Google market, which is why you should install it in order to work further with the device and install applications downloaded from there. To do this, click on setting - security - Unknown sources.
.jpg) 2. Installing APK / program /
Once the application is downloaded from the APK, you only need to click on it to start the process instaltsiya. Follow the steps. Downloaded files will appear in the status bar to accommodate you can get to them.
3. Delete APK / program /
Click on settings - apps, you'll see a complete list of installed programs and applications. Then click the Uninstall icon and the program disappears.
2. Installing APK / program /
Once the application is downloaded from the APK, you only need to click on it to start the process instaltsiya. Follow the steps. Downloaded files will appear in the status bar to accommodate you can get to them.
3. Delete APK / program /
Click on settings - apps, you'll see a complete list of installed programs and applications. Then click the Uninstall icon and the program disappears.
.jpg) F. Images, Video, government websites
1. Setting the search function media file:
The device offers the ability to search the desired media file in the network or at the very memory of the device. However, this will slow down on the miniPC. Thus, you can set up your SD card and follow the instructions:
F. Images, Video, government websites
1. Setting the search function media file:
The device offers the ability to search the desired media file in the network or at the very memory of the device. However, this will slow down on the miniPC. Thus, you can set up your SD card and follow the instructions:
.jpg) 2. How to play the file with higher resolution:
To view the files you have in your memory with high resolution, please click:
2. How to play the file with higher resolution:
To view the files you have in your memory with high resolution, please click:
.jpg) Then you just choose one and run it.
3. File management:
copy, paste, cut, delete, rename
The device offers a wide variety of system functions of each file, and save it all becomes easy, fast and very practical. To do this click on the icon:
Then you just choose one and run it.
3. File management:
copy, paste, cut, delete, rename
The device offers a wide variety of system functions of each file, and save it all becomes easy, fast and very practical. To do this click on the icon:
.jpg) And once you open the list, click on the file you want to change and hold to display the following menu:
And once you open the list, click on the file you want to change and hold to display the following menu:
.jpg) Choose which operation you need, about selected will appear red frame. Click and hold the mouse on the folder you want to change.
4. Music:
Click settings and then the music
Choose which operation you need, about selected will appear red frame. Click and hold the mouse on the folder you want to change.
4. Music:
Click settings and then the music
.jpg) 5. Work on the Internet:
When you connect to the Internet, you will be able to work with Android browser and access to sites and pages or to re-install your desired browser that you used to work with.
Click on settings-browser
G. Languages and added:
1. Language selection and addition method:
The device supports 54 different languages. Click on the setting-Language and input
5. Work on the Internet:
When you connect to the Internet, you will be able to work with Android browser and access to sites and pages or to re-install your desired browser that you used to work with.
Click on settings-browser
G. Languages and added:
1. Language selection and addition method:
The device supports 54 different languages. Click on the setting-Language and input
.jpg) 2. Use Keyboard and Mouse:
When connected only physical mouse, operating system it allows you to work with "soft", a virtual keyboard. If over time the operating system detects that there is already a physical keyboard connected to the device, the virtual keyboard disappears alone.
2. Use Keyboard and Mouse:
When connected only physical mouse, operating system it allows you to work with "soft", a virtual keyboard. If over time the operating system detects that there is already a physical keyboard connected to the device, the virtual keyboard disappears alone.
.jpg) Technical specification of PC04
three in one
1. Remote control, computer keyboard or computer mouse - which of the three is this tool? In fact, all three in one. You can enter data in it, such as a keyboard, work with applications such as a mouse and turn on and off various applications from a distance by remote control.
Technical specification of PC04
three in one
1. Remote control, computer keyboard or computer mouse - which of the three is this tool? In fact, all three in one. You can enter data in it, such as a keyboard, work with applications such as a mouse and turn on and off various applications from a distance by remote control.
2. Computer Keyboard:
.jpg) < br />
< br />
3. Computer Mouse:
.jpg) < br />
< br />
main features:
1. The keyboard works with standard AAA batteries, which you can buy at any place in the world that will not interfere with your work. No need to recharge the internal battery charger which may not be consistent in every country.
2. Incredible and compact design that prevents slipping and dropping.
3. The keyboard has a receiver and a wireless mouse, which eliminates the risk of loss of signal at a time and an area where you are.
4. Humane design of any mechanism on the keyboard allows everyone to work easily, quickly and conveniently with it.
5. With built-in special technology, which saves power and thus increasing battery life. This is thanks to the fact that after two minutes had no activity, the batteries and the keypad go dormant. To activate it then just press any button.
6. No need to install drivers for it to work, plugNplay device compatible with USB 1.1 interface and USB 2.0
7. Easily connects to any device, no need for additional cables. Only when using the remote with batteries is well put mouse and receiver into a USB interface to use both devices.
8. Supports the following operating systems: Windows XP/Vista/7, also supports Android 2.2/2.3/2.4/4.0/5.0, making it the perfect tool for communication with any tablet or smartphone with a version.
9. You can use with any desktop, laptop, tablet, projectors, smartphones, smart TV for the living room, HDTC, a tablet with Android and others.
Button functionality:
.jpg)
The other buttons have exactly the same functions as any standard keyboard.
Initialize settings:
When cursor "freezes" and does not move, follow these steps to reset the settings to work again with your normal keyboard.
1. Place the device on the desktop of a flat surface and press and hold both buttons arrow up, down and ENTER button. Arresting the three buttons for about a minute, LED indicator on the keyboard flashes, which is an indicator for the current state of radio mouse.
2. Release the buttons when the LED indicator flashes, and the USB host interface to start the radio button to initialize your code. When the LED stops flashing and remains lit, then download successfully initialize the setting.
Function keys:
1. Buttons for directions: the directional buttons as up, down, left and right are the same as in the ordinary keyboard.
2. The left mouse button performs the same functions as in the standard computer mouse.
3. The right mouse button performs the same operations as in the physical mouse.
Installation and Connection:
1. Open the back cover of the radio mouse-keyboard, insert three AAA batteries, and with correct polarity, then close the cover with a click.
2. Plug the USB receiver into the USB slot on your computer or tablet.
Use:
1. Use of radio mouse: Holding both sides mouse with your hands, you can control the directional buttons, left and right mouse button with your left hand and drag the slide with the thumb of the right hand.
2. Use the wireless keyboard: When move the cursor to a specific direction, you can use the left and right hands to press any key on the keypad to enter the desired characters.
.jpg)
What do the different conditions an LED indicator:
1. When the indicator of the mouse constantly blinking, it means that the link did not take place and no mouse at the moment.
2. When its indicator lit continuously, then the connection is stable and the device is working properly.
3. If you press any button, you will see how the indicator flashes once.
Technical Product Specifications:

Wireless mini keyboard + Mini PC with Android 4.0 (ID: PC04+PC02)